
I do a lot of repotting blogs, and so far all my repotting posts have been about plants I have had for several years. However, I know many of you have questions about repotting newly acquired plants as well. I picked up a Croton Petra recently because the price and the size were right. I’ll walk you through how to decide when to repot a Croton Petra and the steps to take to successfully repot.
Croton Petra Care
Crotons are a big genus known for showy foliage, at least for the varieties widely sold as houseplants. The leaves often sport vibrant colors in varied color patterns. In addition, the leaves themselves can come in a wide variety of shapes and sizes. Some have long and thin leaves or crinkly and wavy leaves. They are known as a flowering variety of houseplant. The flowers are small and delicate and grow on a long shoot. Many do not get their Crotons to bloom indoors though. Croton Petras require a lot of light. They will do best in a south-facing window with direct light. If your Croton Petra leaves are not very vibrant in color it’s likely due to a lack of adequate light.
| Light Needs | Watering Needs | Soil Needs | Fertilizing Needs |
| Bright direct light. | Top inch should be dry before watering. | Well draining potting soil. | Every 2- 4 weeks during the growing season. |
Croton Petras are otherwise pretty easy in terms of care. They have high light needs, but they can be forgiving with watering and fertilization. For example, I have a Gold Dust Croton that gets a little droopy if it needs to be watered, but perks right back up once I water it. I tend to fertilize monthly as well partly because I like to control the growing to a slower pace. Croton Petras are not cat or Dog safe so keep them out of reach for your pets.
When to Repot Croton Petra
In this post, I’m going to focus entirely on deciding whether to repot a newly bought plant. Many of the same rules apply, but if you’re looking for guidance on repotting an old Croton, check out my Repotting a Gold Dust Croton post. The two big differences for a plant you just bought. First, you are most likely going to spend your money on a plant that already looks awesome so that rules out any yellowing/browning or droopy leaves. Second, you won’t have any history of your new plant’s growth. For example, you won’t know if it was growing fast, but is now slowing down.
When you have a brand new plant, how do you decide whether to repot or not? The answer is inside the pot. You need to look at the roots. A Croton Petra that might need to be repotted will have roots that fill out the shape of the nursery pot. There may be a denser collection of roots at the base. See an example of this below. You can still see a fair amount of soil so it’s not completely rootbound, but this plant could easily go into a bigger pot.
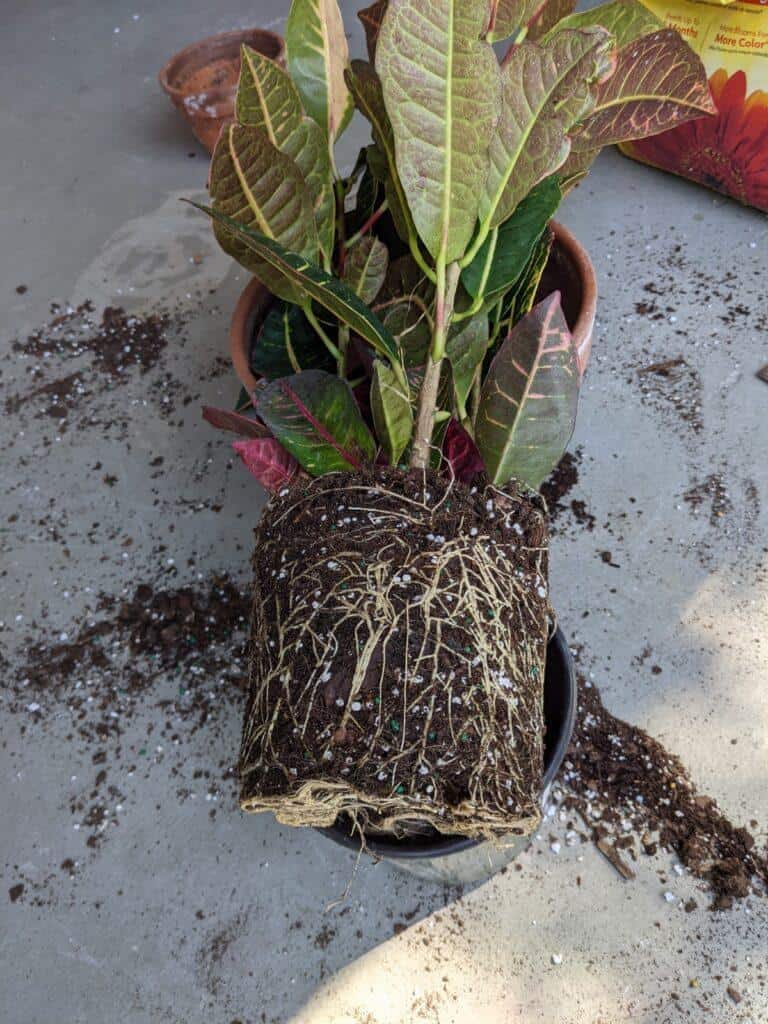
On the other hand, if the root ball had not yet filled out the pot that doesn’t mean you cannot repot. Be smart about your pot size though. If you do repot a Croton that has not yet filled out its old pot, you should not go into a larger pot. Choose a pot that is the same size as the nursery pot or about one inch bigger than the existing root ball.
If you’re reading this post and still hesitant about whether or not to repot your Croton Petra, just wait. Many people stick the nursery pot into a larger more decorative pot or basket. This is a great solution for when you have a decorative pot that you really want to use, but the root ball is not ready for a larger-sized pot.
How to Repot a Croton Petra
Choose the Right Pot
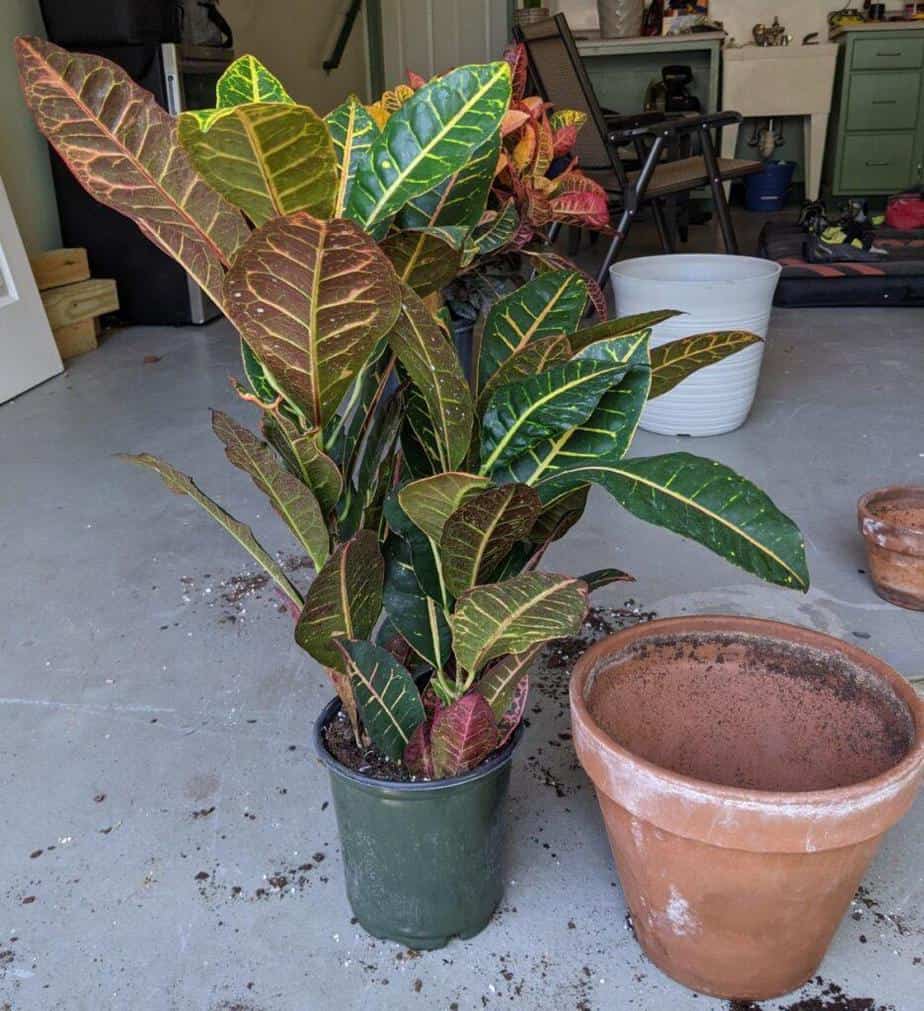
I just talked a lot about repotting and pot size, but it bears repeating. Pot size is very important. You need to give your plant some room to grow. In addition, more soil means more nutrients but it also holds more water. A pot can be too big. A good rule of thumb is to select a pot that is an inch or two larger in diameter compared to the root ball. In addition, it is very important to have drainage holes. I’m flabbergasted at how many pots I encounter that do not have holes. If you need to add holes to your pots, check out my post how to drill holes in ceramic pots. I chose a terracotta pot that’s about two inches larger for this repot.
Croton Petra Soil Mix
You do not need specialized soil formulated for Crotons. I have kept many varieties of Crotons for years. I use the same potting soil and perlite that I use for all my indoor plants. Croton Petras like to dry out the top inch or so of the soil before watering so based on that I like to amend my regulars potting soil with a little extra perlite to aid in drainage. I usually add about one part perlite to three parts potting soil.
Steps to Repot a Croton Petra
- Remove your Croton Petra from the old pot. You may have already done this when you were looking at the roots to decide whether to repot or not.
- Take a look at the roots. Now is a good time to check if your roots are healthy. They should be white and firm. Anything mushy or smelly could be root rot, which you should remove with a sterile knife. You can also try to loosen the root ball, but it’s not necessary in my experience.
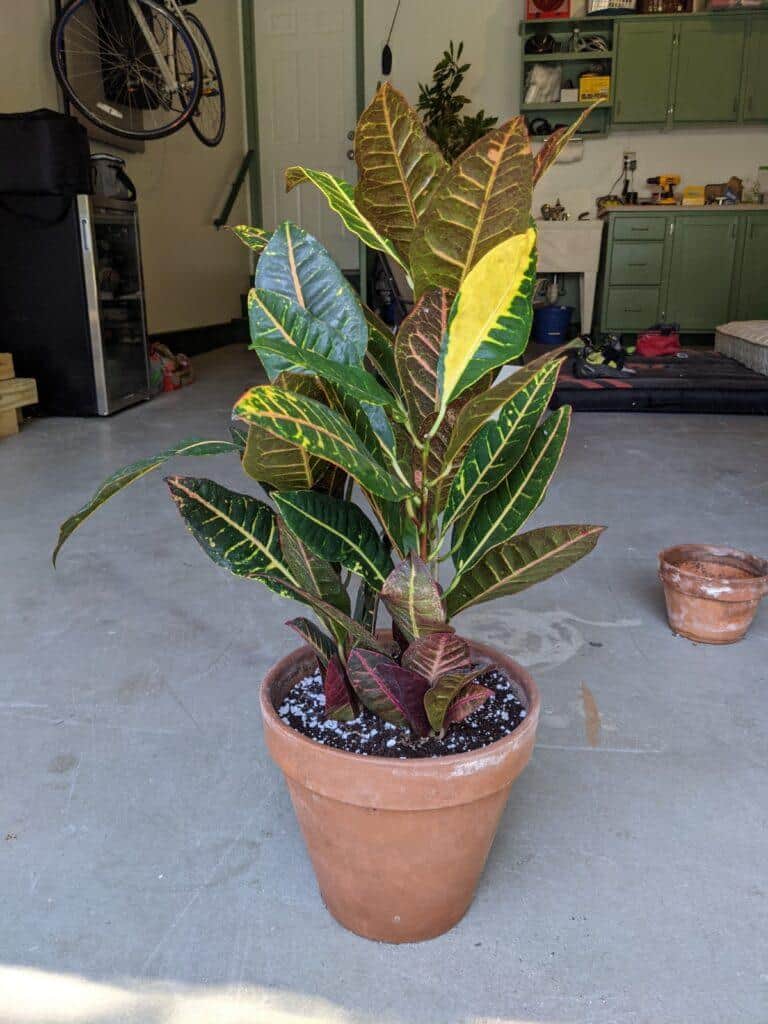
- Prefill the new pot with the soil you mixed for your Croton Petra. You only want to fill the pot to the level that you want the base of the root ball to sit.
- Place the Croton Petra in the pot and then backfill the soil mix around the sides and on top of the root ball. Don’t put a lot of soil on top of the root ball as moving soil up the trunk can cause rot.
Then you’re done!
After repotting take caution from introducing any additional shocks. For example, don’t change the amount of light the plant is receiving. In addition, it’s good to try and wait a few days to water if you can. Have any questions about your Croton Petra? Share in the comments.
I'm a long time plant lover on the quest to happily coexist with as many plants as I can. Let's grow!