
About five weeks ago I wrote a blog about pruning my giant Jade Plant. Then I did a follow-up blog on rooting the cuttings that I pruned from my Jade. This is the final blog to complete the trilogy. We will take a look at which cuttings rooted successfully and we will also pot them up.
Jade Cuttings Recap
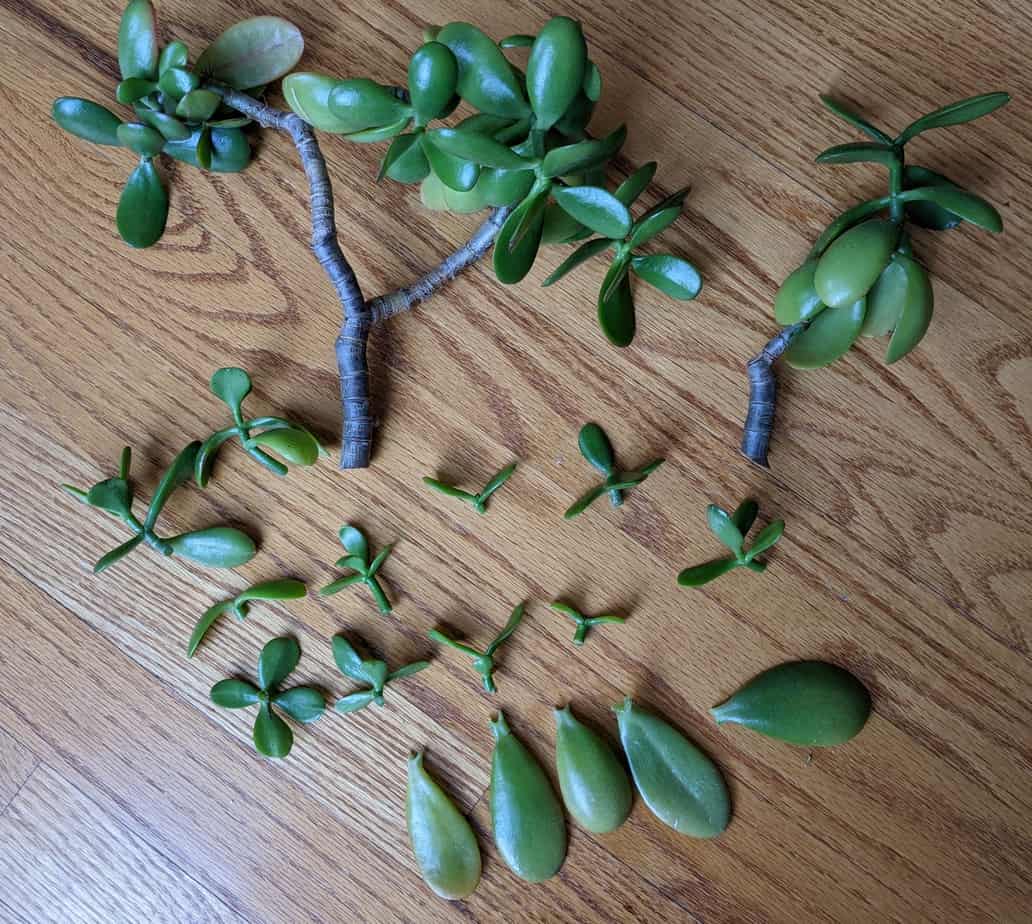
As a reminder of where this started, after pruning my Jade there were three large woody stems (it was two in this picture but when I went to propagate these I split the large one on the left into two at the big Y), eleven small stems, and five leaves to propagate. The woody stem cuttings typically take the longest to develop roots and will need a relatively large root system before being potted up successfully. The green stems and leaves typically take about the same time to root and can have much smaller root systems when they are potted up.
Jade Rooting Method
Let the Jade Callous Over
We let the Jade cuttings callous over for a few days. This allows the open wound to dry, which in turn makes it less susceptible to disease.
Dip the Jade Cutting in Rooting Hormone
Once the cuttings had calloused, I moistened the ends and dipped them in rooting hormone. This rooting hormone has indole-3-butyric acid as the active ingredient, which is similar to a naturally occurring rooting hormone in plants.
Soil Propagation
Most of the cuttings were placed on loose soil to be propagated. The soil mix was regular potting soil and perlite at about a 7:3 ratio. The Jade cuttings were left on a desk about seven feet from a south-facing window, where they did not receive direct light. I ended up only trying to propagate three woody stems, five green stems, and five leaves in the soil.
Water Propagation
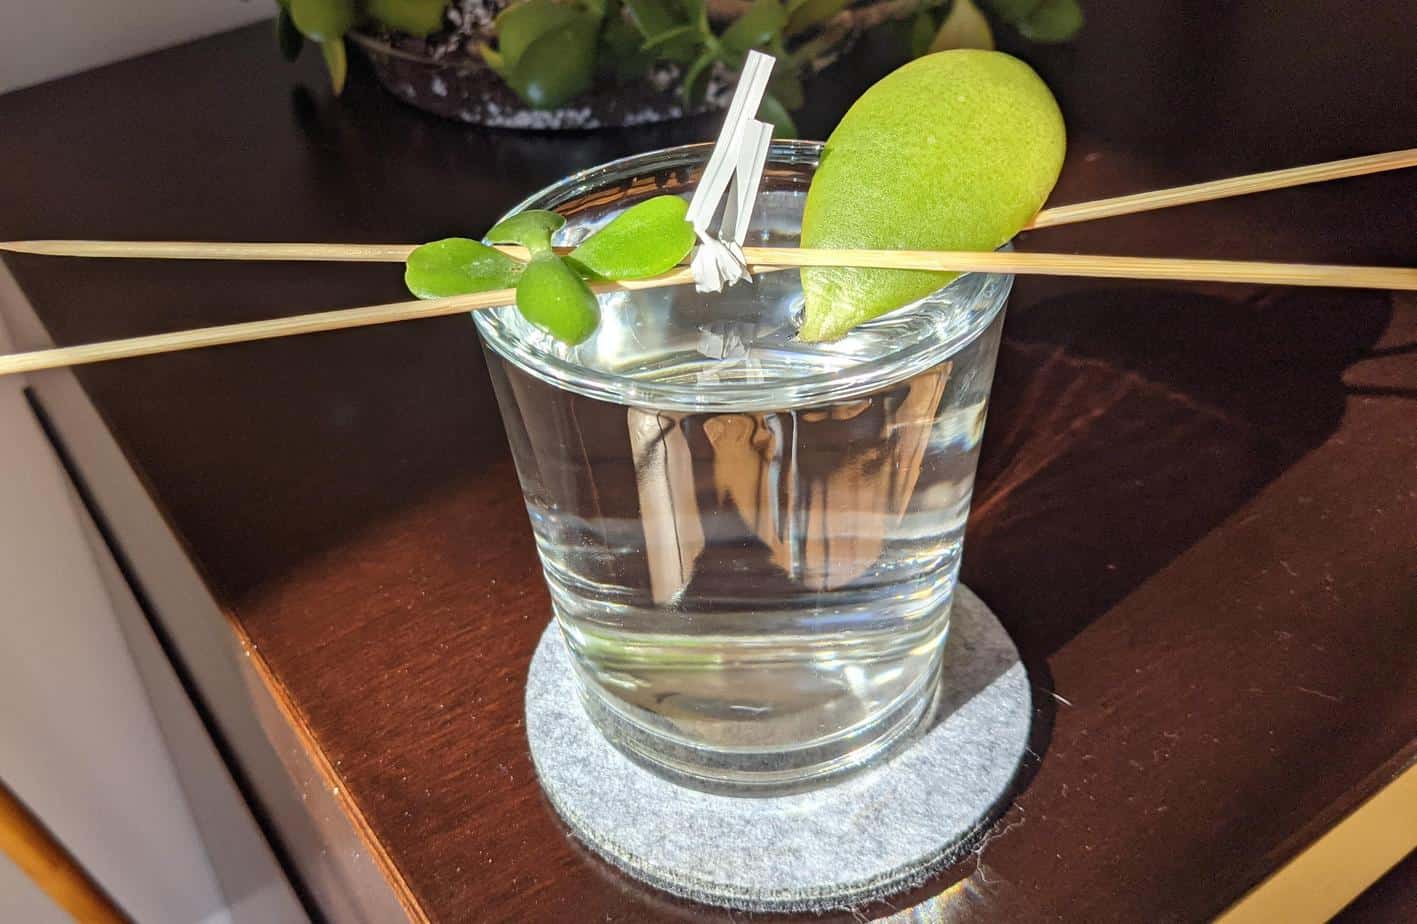
The water propagated Jade cuttings were perched on a cup of water. Care was taken so that only the part of the cutting that should root is touching the water. I only choose to water propagate one green stem and one leaf
What Happened to the Jade Cuttings After Five Weeks
First, I want to make a disclaimer that I got a promotion during these five weeks. Yay! What that really means is I became very busy and a bit neglectful of the Jade props. I’ll still walk you through my process because I had some success and you can too.
Watering Jade Cuttings
I went in with the intention of making sure the soil was moist but not wet. In reality, this means checking the soil every day, or maybe every other day. That lasted for about a week and a half at which point it became more like twice a week. The soil for the Jade cuttings was definitely bone dry in between checking/watering. That’s okay for succulents luckily because they store a lot of moisture in their leaves, but you can’t be as relaxed when propagating a leafy plant.
The water propagated Jade cutting received a similar treatment. My problem was that only a little water needs to evaporate before the Jade cutting isn’t even touching water any longer. It’s also winter and we’re running the heater which evaporated the water quickly as well. As a result, my water props ended up not touching the water very often.
Jade Cutting Success and Failure
Failure
Okay, first we’ll talk about the failures. I just couldn’t keep the water props touching the water. In my opinion, it takes too much active care to do so. You need to keep most of the Jade cutting out of the water to avoid rot and in doing so that means you have to refill the water daily. I ended up giving up on the two water props around three weeks in. In hindsight, I should have thrown them in the soil, but I just ended up trashing them. I had a lot of cuttings to start with so it wasn’t a big loss. We’ll call water propagation 0 for 2.
The soil propagated Jade cuttings did better. The only cuttings that didn’t do well with my neglectful watering were the leaves. I tossed three of the five leaves I attempted to propagate because they began to shrivel and brown.
Success
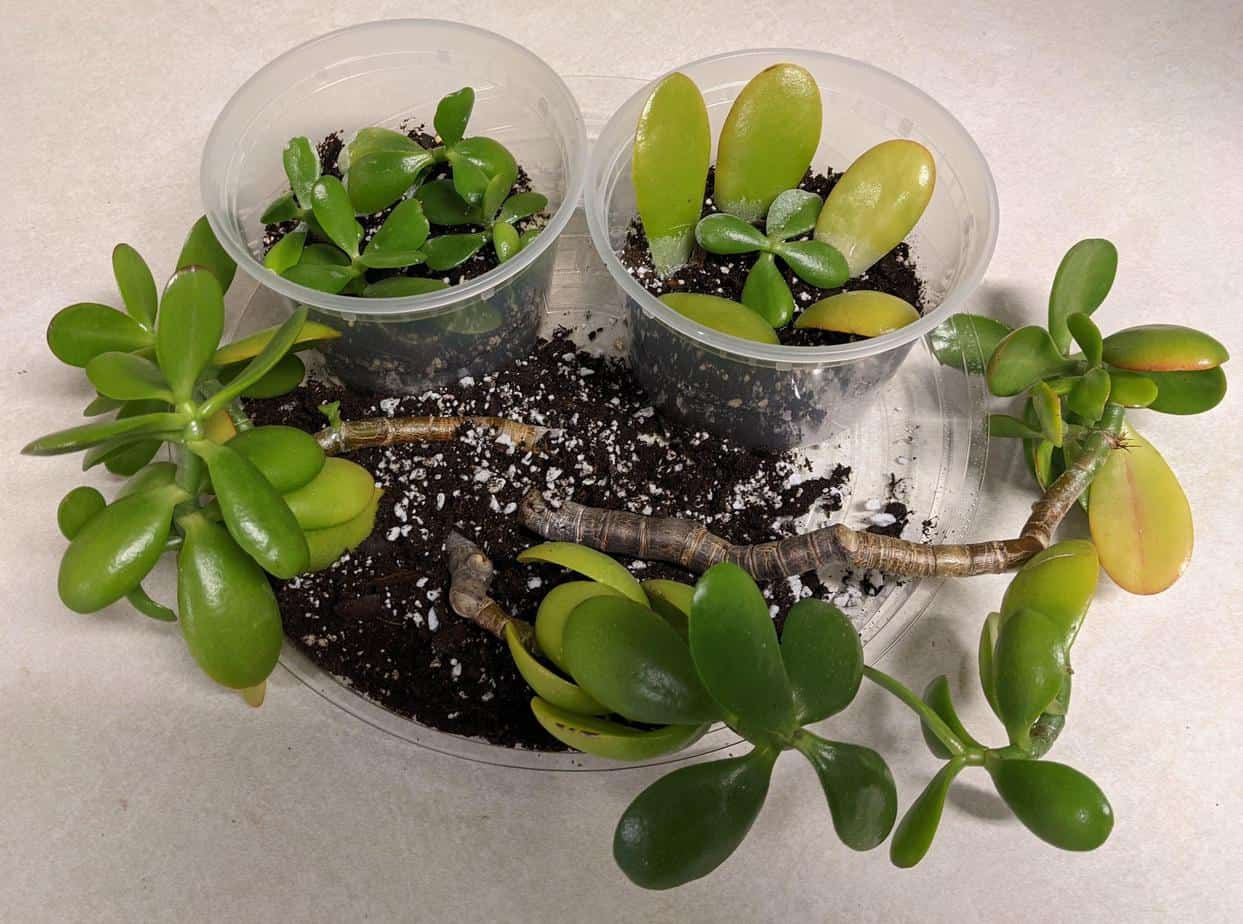
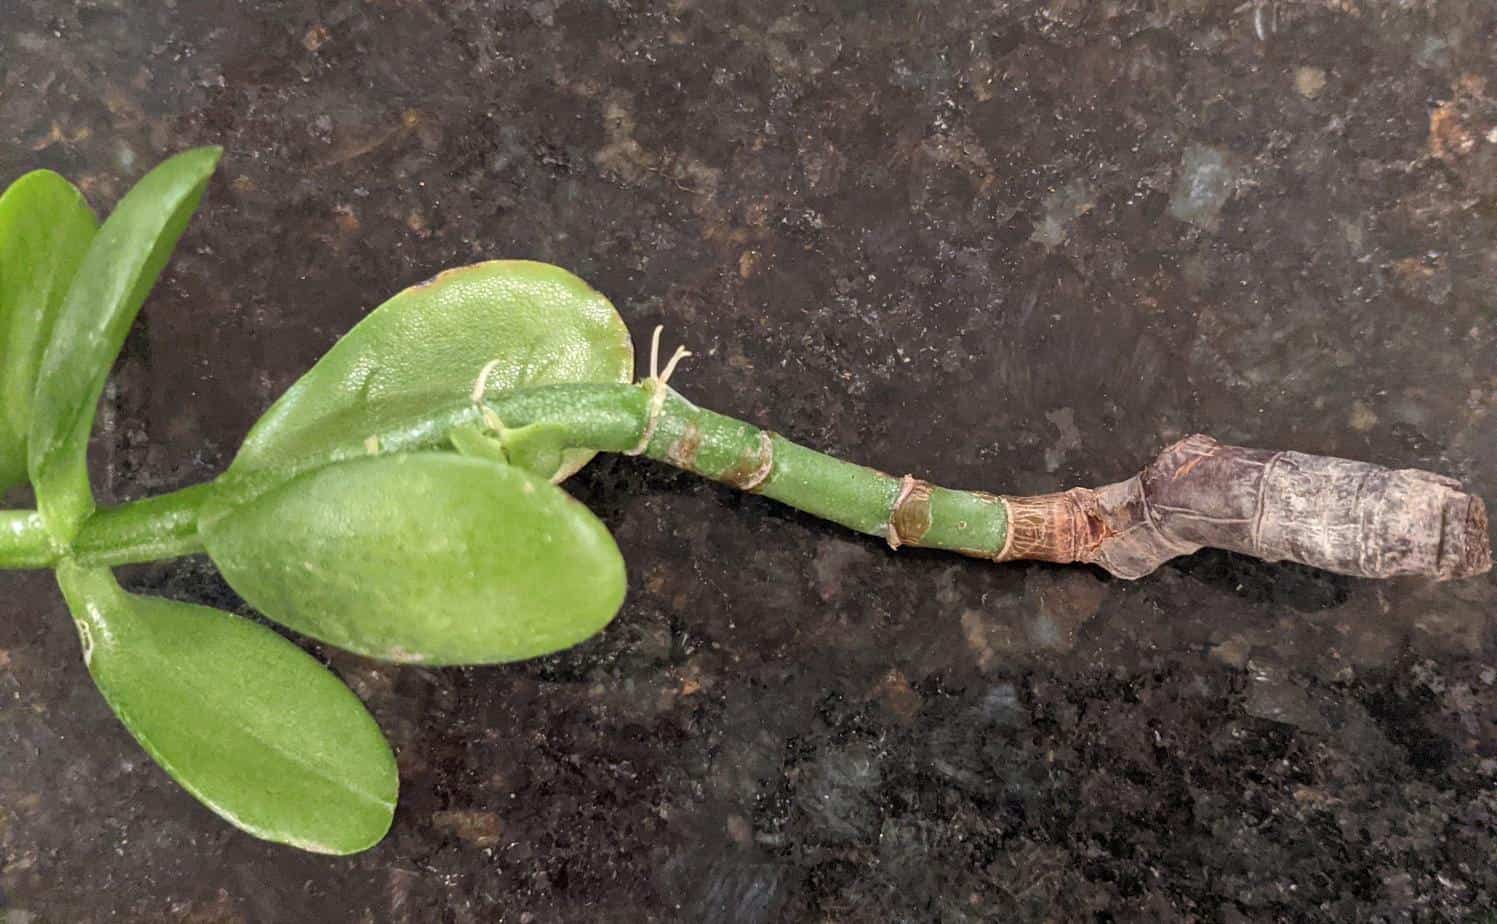
The green stemmed Jade cuttings in the soil were by far the most successful props of this batch. Of the five I planted, four had decent roots growing by week five. See below, four of the cutting have soil-covered roots. The fifth, on the right, did not grow roots but it could. It’s not rotten or shriveled.
One of the three woody stems has grown a nice amount of roots as well. I will keep it in the propagation station for now because it needs way more roots to be potted up. I want enough roots to be present so that I don’t have to use stakes to stand it upright when planted. Still, this is a nice start considering the woody stems take longer to root.

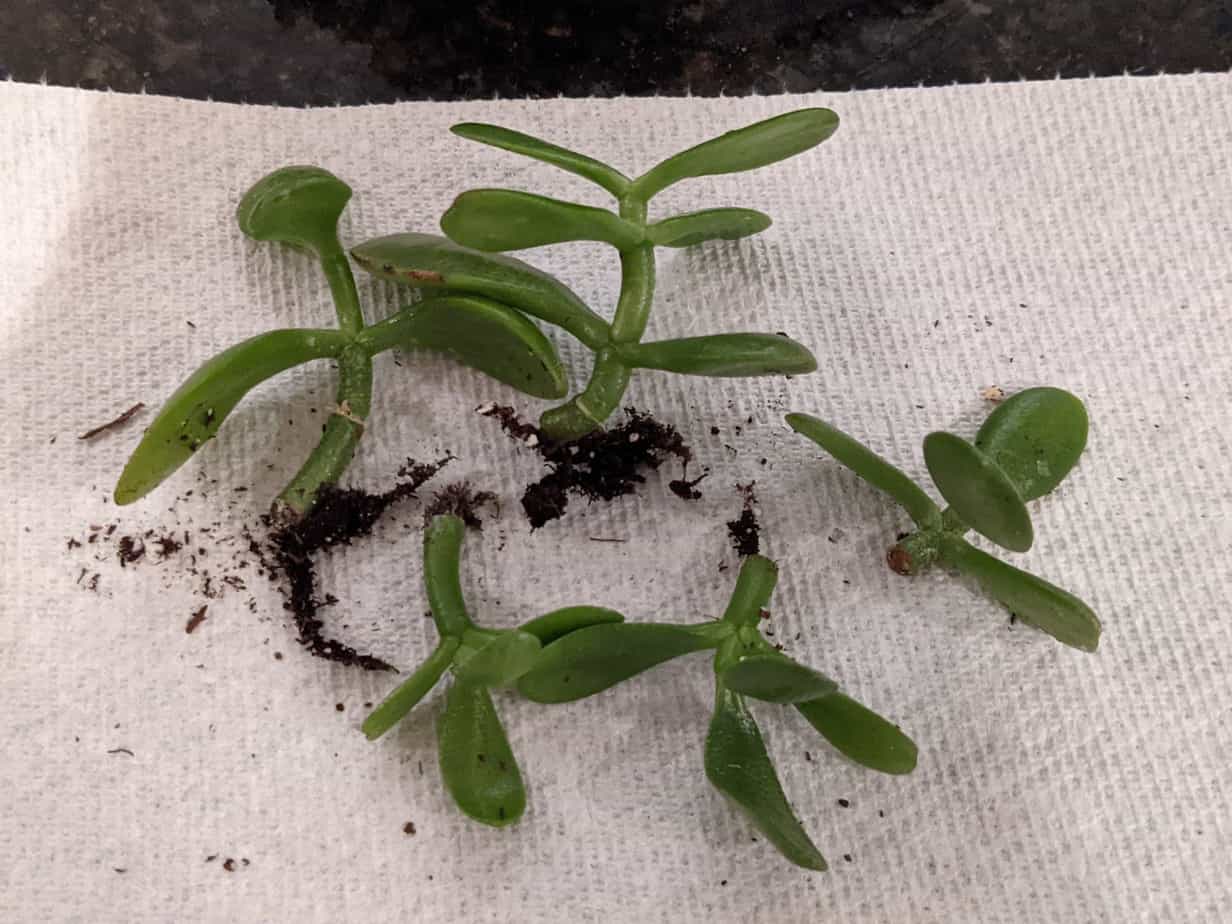
Finally the two leaves. I might call this one leaf, and it’s not very good. The leaf on the left clearly has a root growing out of it. It’s still green and plump so I expect it has a high likelihood of growing more soon. The leaf on the right is beginning to look in a sad state. I’m also not sure those are roots growing out of the bottom. They actually look like they could be leaves! I think that leaf might be confused about what it’s supposed to do. I’ll try to pot it up anyway and see what happens.

Neither Success nor Failure
The two woody stems with no roots aren’t ready to be called successful or failures. As I mentioned earlier, the woody stems take longer to root. I did decide to further trim one of them because the woody base was starting to shrivel. You can see it’s kind of wrinkled in the picture. This Jade cutting is also confused as you can see it is growing roots out of two different nodes o the green part of the stem. I only trimmed it up to the base of the woody part of the stem, but I could trim it up to the node with roots if I want to jump-start rooting.
How to Pot Up Rooted Jade Cuttings
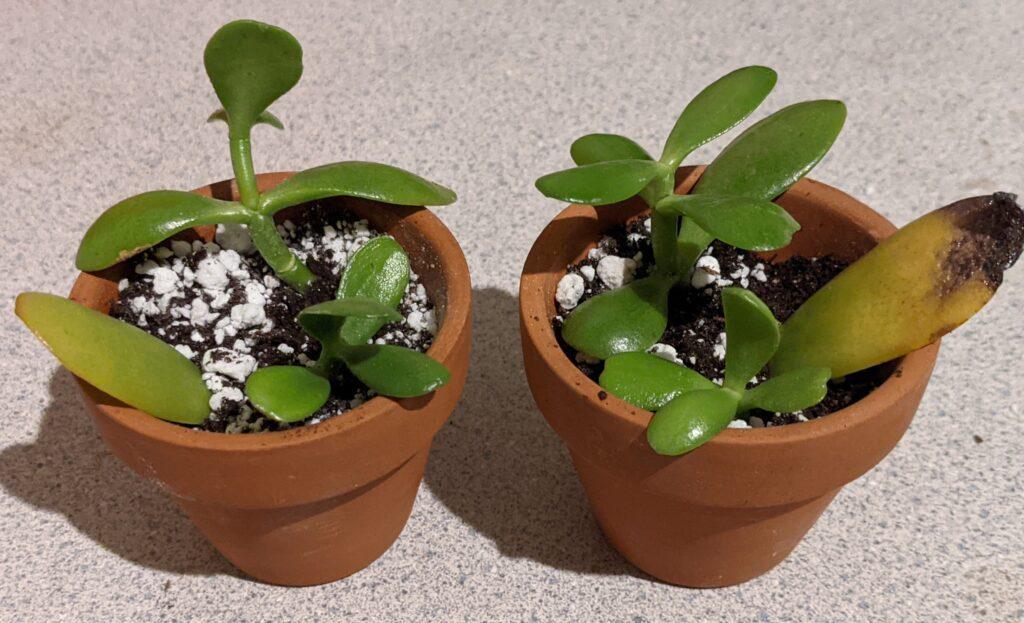
At this time I plan to pot up all my successful cuttings except the woody stem one. I want that one to have more roots before I stick it in a pot. That means I have four green stem cuttings and two leaves to plant. I have two two-inch terracotta pots laying around to use. Terracotta is great for newly rooted cuttings because it’s porous and dries out quickly. Immature root systems won’t absorb moisture very quickly so using terracotta is a great idea for newly rooted cuttings.

I use a soil mix with potting soil and perlite and use a ratio of about 7:3. For small cuttings like this, I like to fill the pot completely. Then you can use your finger or a pencil to poke a hole to place your rooted cutting. I did this with my green stem cuttings. The leaf cuttings should just barely be in the soil so the roots are in the soil but most of the leaf is not. I generally wait a day or two to water the soil to let the plants acclimate to their new home. Once your Jade cutting has roots and is potted up, you can give it more light than you would a non-rooted cutting.
I want to mention one more thing. It is normal for propagated leaves to shrivel and die off. As long as there are roots, it can survive. The leaf uses its resources to grow roots which sometimes results in the leaf dying off. This doesn’t always happen but it can happen and you should know it’s not a failed prop despite how it looks. Bottom line, if you have roots and an ugly leaf, leave it. You can still get a new plant.
What are your propagation successes and failures? Share in the comments.
I'm a long time plant lover on the quest to happily coexist with as many plants as I can. Let's grow!