
It’s repotting season at my house lately. Mainly because it’s winter, and it’s best to repot while plants are dormant. Also, my Monstera Delicsiosa has some roots popping out of the pot. Like my recent repotting posts for Pothos and Fiddle Leaf Figs, I’ll walk you through the basics so you can be confident when repotting Monstera Deliciosas.
When to Repot Monstera Deliciosas
As I mentioned earlier I like to repot my plants during their dormancy. It’s a good best practice of when to repot Monstera. For me, that’s wintertime.
Monstera Roots are Growing Out of the Soil
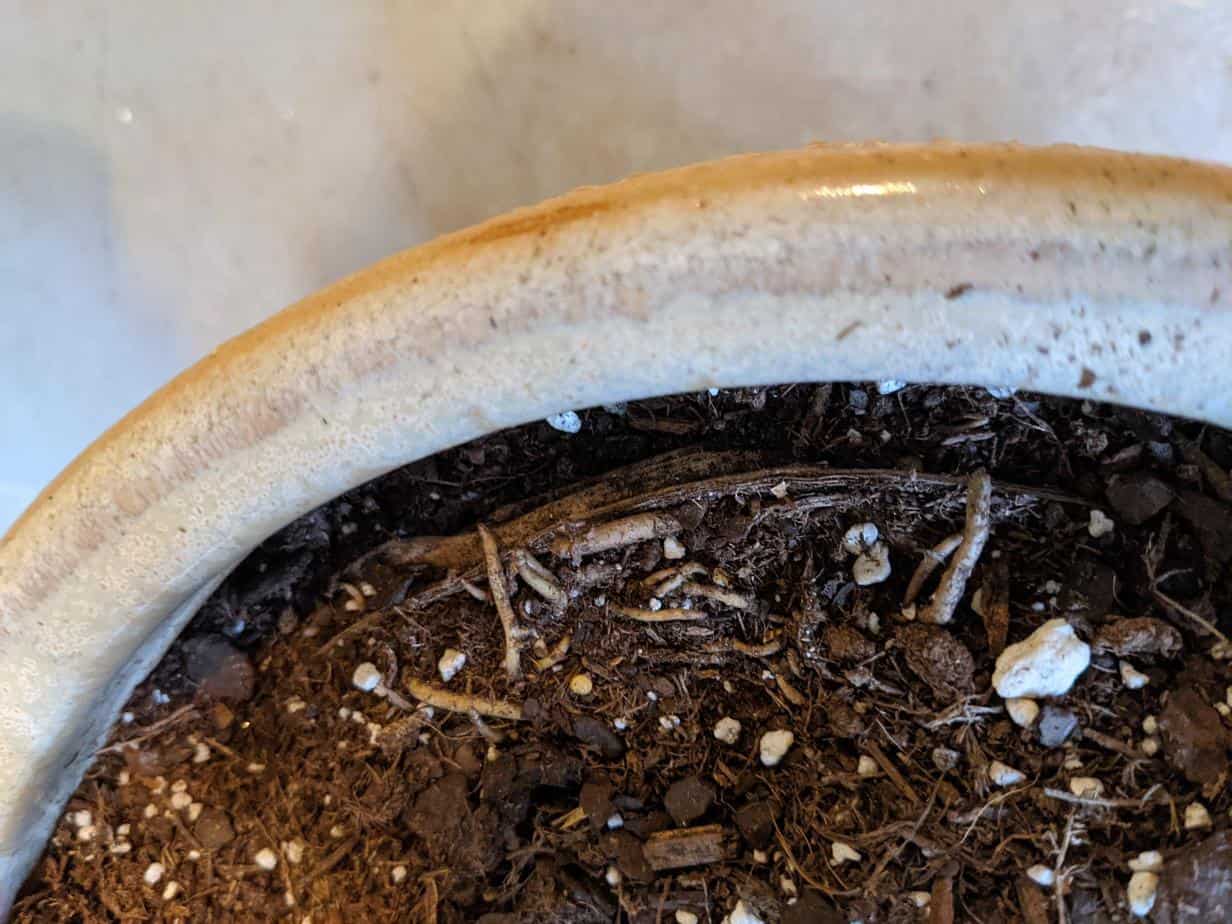
In my case, I noticed several roots growing up from the soil. The roots must be pretty crowded in there if the roots are growing away from the soil which holds the moisture and nutrients it needs to thrive. When roots are cramped, you may start to see slower growth as well.

I also poked around the sides of the pot and you can see there are a lot of roots tightly encircling the pot edge, which is another indication that the roots need more room. Note the roots I’m talking about here are the soil roots, not the Monstera aerial roots. Monsteras grow tons of aerial roots which help stabilize the top-heavy growth. Monstera aerial roots are not a cause for repotting.
Monstera Watering Issues
Watering issues are a sign that you should be repotting your Monstera. Watering issues can present as soil drying out too quickly or not drying out quickly enough. If your soil is drying out too quickly, you probably need to repot your Monstera into a larger pot. The larger pot will hold more soil which will retain moisture longer.
If your soil is not drying out very quickly it may be due to a number of factors. You might be watering your Monstera too frequently or the volume of water is too much. Your pot may be too large for your plant, or it doesn’t have drainage holes. If either is the case, you should be repotting your Monstera into a more suitable pot. Terracota pots are very porous and therefore somewhat forgiving of overwatering.
Lastly, you should know about your watering issues because you should be checking your soil moisture regularly. You can do this by sticking your finger in the soil. You should not water your Monstera unless the top inch or two of soil is dry. There are also cheap soil moisture meters. I personally love these. They take the guesswork out of soil moisture. In my opinion, they allow you to be way more accurate in your soil moisture assessment. Also, it keeps me from having to clean dirt out of my fingernail all the time.

Yellow or Brown Leaves
First, don’t be too alarmed if you have one or two yellowing leaves at the bottom of your Monstera. It’s normal for older leaves to die off eventually. There’s nothing you can do to stop that and you don’t need to prevent it anyway. However, if many leaves are turning yellow or brown, then you may have a problem. This could be due to overwatering or underwatering. Refer to the earlier section on watering issues for more information on that. It may also be due to soil fertility, either too much or too little. You can ask yourself how often are you fertilizing? Are you following the directions on the fertilizer with regard to dosage and frequency? Many fertilizers require dilution, so make sure you’re doing that correctly.
Those questions don’t really give you concrete answers to whether the Monstera soil is too fertile or not fertile enough though. If you want to take a more scientific approach, I like these rapid soil test kits. They measure pH, nitrogen, phosphorus, and potassium.

Repotting Monstera Step by Step
Repotting Supplies
Monstera Pot
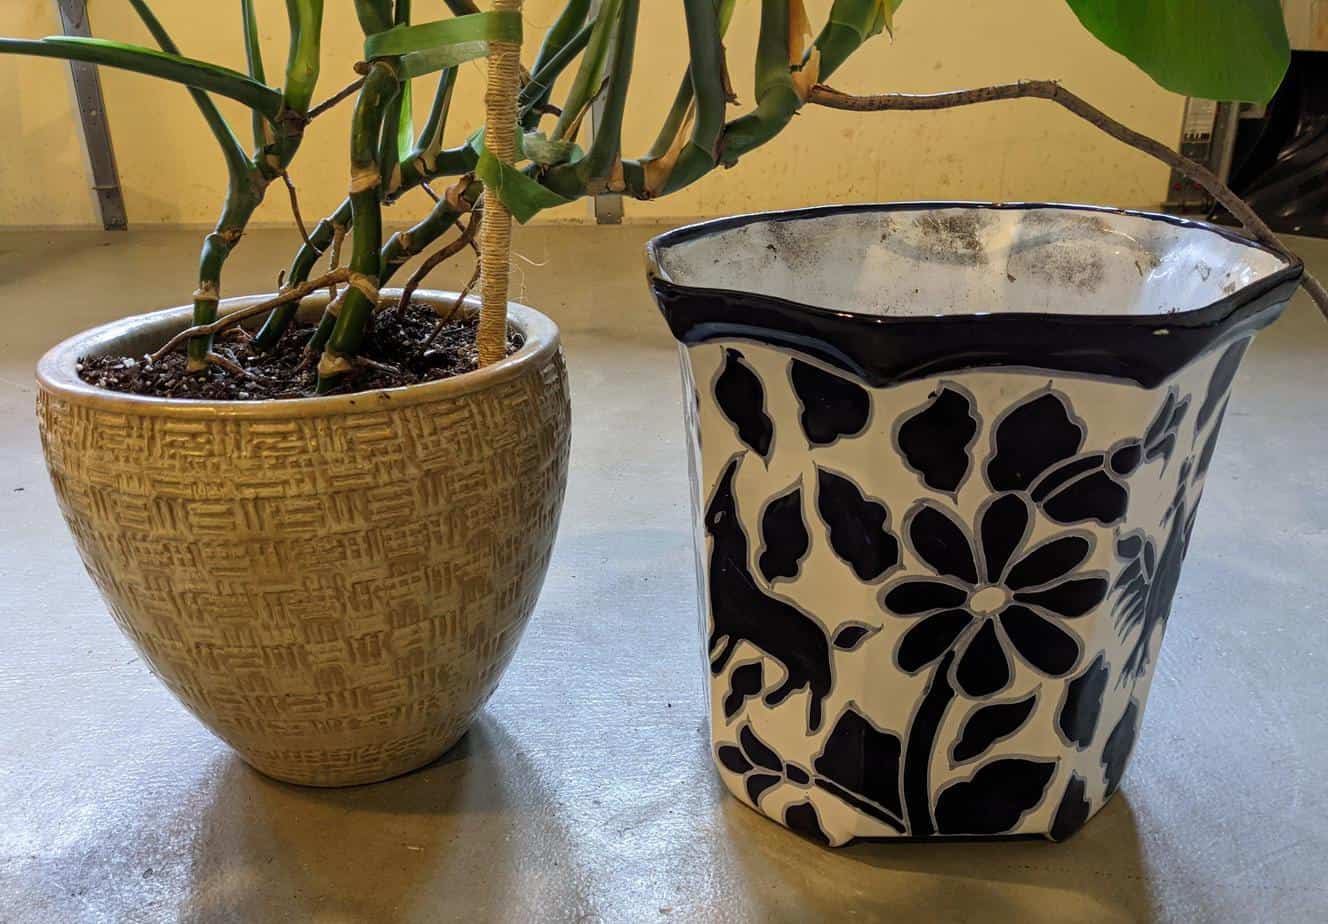
In most cases, you will be repotting your Monstera into a new larger pot. A larger pot provides room for the roots to grow. It’s recommended that you go for a pot that is one or two sizes up from your current pot, and size is generally determined by the diameter of the pot. Do not go too big or else you will risk having watering issues. Your new pot must have drainage holes as well. I happen to already have a pot that’s big enough to move my Monstera to, but if I were buying a new one I would have probably gone one size bigger. I may only get one year out of this pot before I’m repotting this Monstera again.
Monstera Soil
Monsteras don’t need special soil. Traditional potting soil will do the trick. I like to add extra perlite to most of my plants to facilitate drainage as well. Try using a 3:1 mix of potting soil to perlite if you’re looking to mix your own Monstera soil If you are repotting your Monstera because of a watering issue, you should probably use perlite as well.
Things You Might Need
- A garden trowel to help loosen the roots from the pot.
- Gloves if you want to keep your hands clean.
- Plant pruners. If you are having watering issues you may have to remove some root rot.
Remove Your Monstera from the Old Pot
Monstera roots are very grabby. If your plant’s roots were crowded, then you will probably need a trowel or something thin and flat to help pry the roots from the inside of the pot. I really had to wrestle this one out. It took a lot of prying and wiggling to get it loose. Also please learn from my mistake. Do not plant your Monstera in a pot that has a bulbous shape where the top of the pot is more narrow than the widest part of the pot. I repeat, it was VERY hard to get this Monstera out of the pot. Remember to be careful of your leaves while prying and wiggling. I found the flattest side and then laid my Monstera down on its side to do a lot of the work.

Inspect and Loosen the Monstera Root Ball
Once you have your Monstera root ball out, take a close look. Healthy roots will be firm and white or white-ish brown. Rotten roots will be brown and soggy to the touch. You can also loosen up the root ball, especially if the roots are wound very compactly. You don’t need to separate any roots just give it a squeeze from multiple angles. Some old soil may fall out and that’s totally fine, you’ll replace it with fresh soil soon anyway.
Pot Up Your Monstera
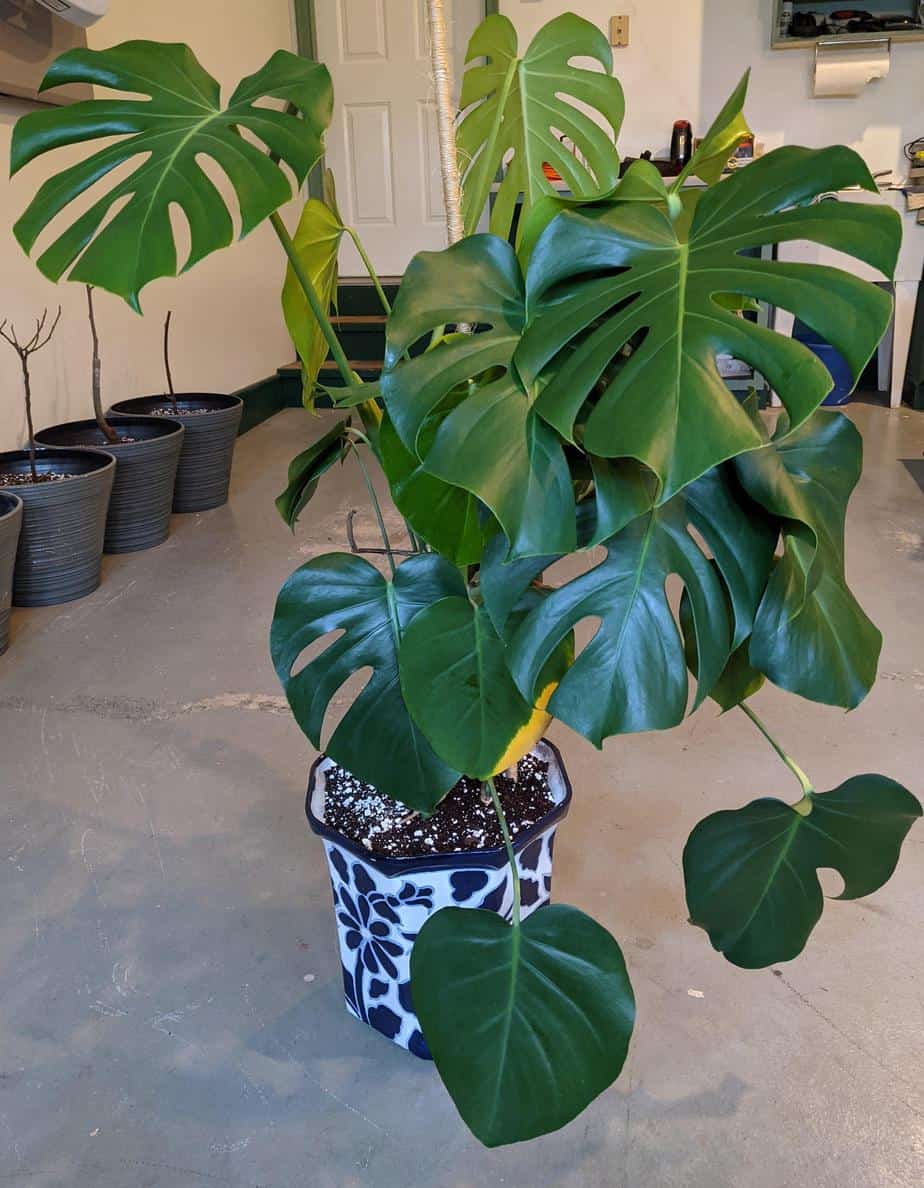
Prep your pot by placing a small square of paper towel over the drainage hole. This will keep the soil from spilling out and creating a mess, but it doesn’t affect water flow in any meaningful way. Put some soil and perlite in the pot to start. I just eyeball it but most perlite bags say to add 25 percent perlite to your soil mix. Don’t fill the pot too much, just enough so the top of your root ball is about two inches below the top of the pot. Place the Monstera into the pot and backfill your soil and perlite mix into the pot to cover the roots.
Repotting a Monstera With a Moss Pole
I repot my Monstera with the moss pole in place. Actually, mine is just a wooden dowel with some twine wrapped around it, but the same thing. If your roots are really dense I think this is the best way to go. Trying to jam a new moss pole into the pot afterward is risky for the roots in my opinion. I did have to reconnect my velcro ties. By the way, I love these green velcro ties. I obviously use them a lot for plants, but they’re great to wrap around cords and other things too. It’s something we always have at the house.

What to do After Repotting a Monstera
Keep it in the Same Spot
Keep your Monstera in the same spot you had it before. This will reduce shock-causing factors. If you’re bringing home a new Monstera and repotting it, you have no choice but to move it obviously. Do your best to provide your new Monstera the same environment (e.g. light and temperature) it was used to if you can.
Watering After Repotting
I usually wait a day or two to water after repotting. You also need to be conscious of the new watering needs of your plant and pot combination. Larger pots will take longer to dry out especially because the roots have not grown into the soil yet. You also need a new watering schedule. You’ve changed the soil so it’s very likely to have different needs.
Fertilizing After Repotting
Monsteras repotted during the dormant period do not need fertilizer. If you repotted your Monstera during the growth cycle, then you can skip a dose of fertilizer. The new potting soil will have some fertilizer in it already and you don’t want to shock your plant. After that, you can resume fertilizing.
Monsteras are pretty hardy plants. In fact, they are considered invasive in some parts of the world. If you break a leaf when repotting, no problem. If you break some roots when repotting, no problem.
I'm a long time plant lover on the quest to happily coexist with as many plants as I can. Let's grow!