
First, I want to acknowledge that Monstera root rot sounds like the start of a tongue twister. This is a follow-up to my last post where I told the story of the Monstera left in my office during the pandemic. It ended up being both underwatered because no one had access to it for months and then overwatered by the well-meaning cleaning crew. The roots on this bad boy deserved their own post. So today I will write about root rot. What causes it, how to identify root rot, and how to treat it.
What Causes Root Rot
Roots can rot when they are exposed to a sustained abundance of moisture for a prolonged period of time. There’s no specific amount of time and no specific amount of water there are too many factors. Many people ask, how can you water propagate a plant where it’s literally submerged in water and not cause root rot? There are a few reasons. Most people that are water propagating plants, completely change the water in the vessel every day or two. This prevents rot from taking hold. In addition, the water vessel does not contain any soil which can carry rot-causing/enhancing stuff. By the way, Monsteras work fabulously well in water propagation. I’ll be writing a post on that soon.
Here are some things that can cause root rot. Watering too often or too much. Your Monstera is a tropical plant so it doesn’t like to dry out completely. Aim for letting your plant dry the top inch or two of soil at least once a week. If you follow this guideline you’ll learn the correct amount of water to provide and the timing. A pot without drainage holes is another risk that I never recommend. As you can see from my poor pandemic Monstera, it was so long overdue for a repot. The roots had filled out the entire pot and nearly clogged the drainage hole as well.
In addition to water and pots, your potting medium could help cause root rot. Potting soil is said to be too rich if it contains high amounts of water retaining materials like peat moss. Some water retention is good, but not too much. In addition, your pot can be too big to the point that the soil holds too much moisture because the rootball is too small for the pot.
How to Identify Root Rot
Generally speaking, one of the first clues that you have a moisture issue will be in your leaves. And Monsteras have great big leaves, so that’s a plus. Hopefully, that helps you spot any problems early. Brown or yellowing leaves are one of the first indicators of your plant being overwatered. That doesn’t always mean root rot but could lead to it.
If the soil on your Monsteras pot is not drying after about a week, that’s another possible warning sign that could eventually lead to root rot. In addition to generally high levels of moisture, you may notice a stinky smell coming from your pot if you have root rot developing.
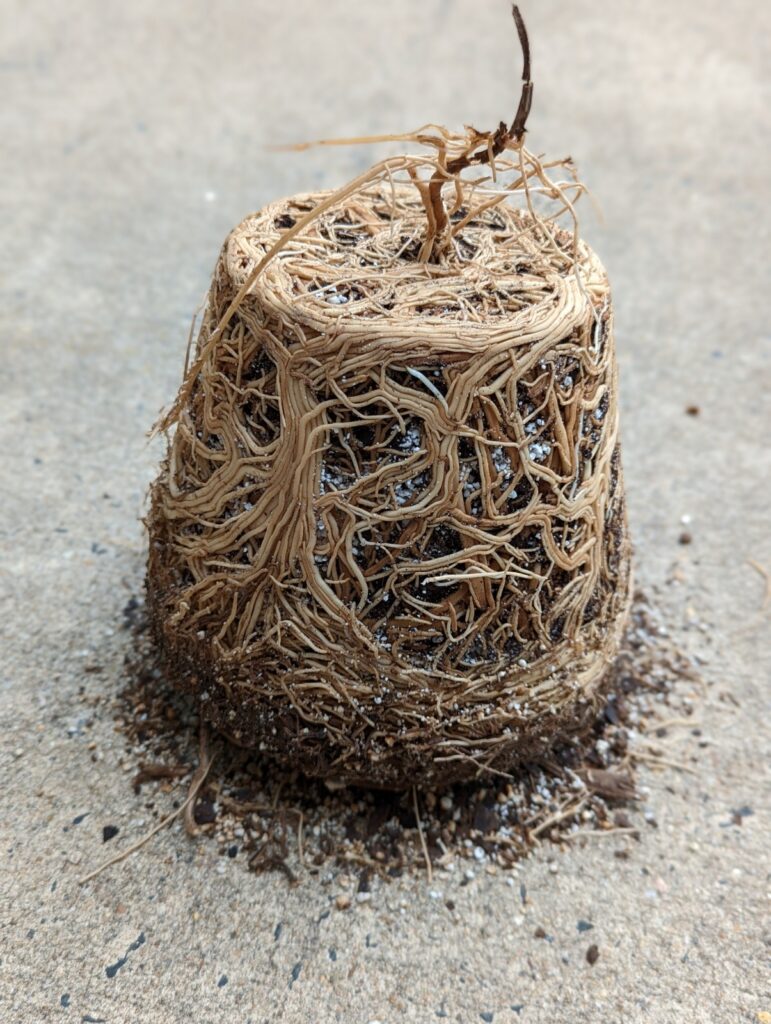
The only true way to identify root rot is to remove your plant from its pot. Make sure you have a clean and sanitized space to do this because if there is rot the last thing you want to do is introduce more germs. Monsteras specifically have pretty aggressive roots. I had a time getting the one pictured above out of its old pot. You may need a butter knife or I use a spackle knife to go around the pot like you’re cutting brownies out of a pan.
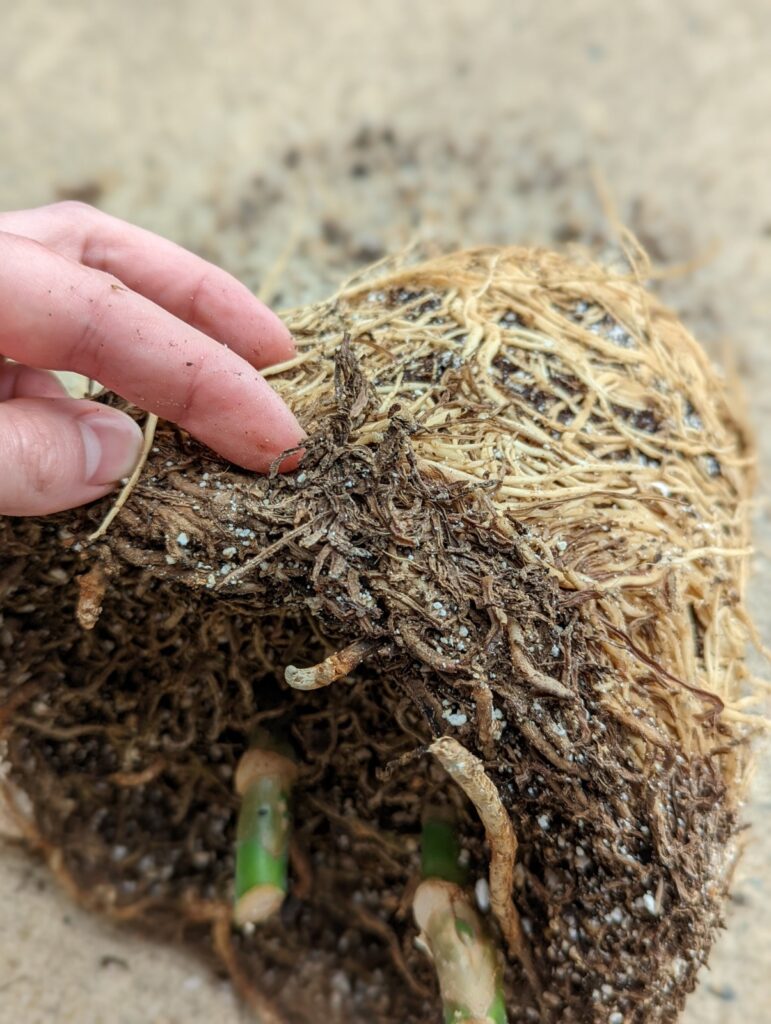
Healthy roots are white and plump. Unhealthy roots are brown and squishy. Sometimes smelly. In the picture above you can see that this root ball is dried out. Yours may not be if you specifically searched out this post, so things may look slightly different. My Monstera was so rootbound and blocked up that the water would pool on top of the soil and roots toward the top of the soil were rotting. A lot of the dark brown roots at the tops that look emaciated would have been squishy and brown if I didn’t let this dry out. Now that they’ve dried they’re just brown and crumbling.
How to Treat Monstera Root Rot
The great news is Monsteras have hardy and aggressive roots. So there’s a good chance a plant can survive root rot if you treat it. If you have identified root rot, then you need to carefully remove any roots that you think are rotten. It’s best to do this with sterile pruning shears, scissors, or a sharp knife. Remove as much as you need to get to clean white roots. Monsteras can handle a root pruning in most cases.
Once you have pruned the roots, leave them out of a pot and soil for at least 24 hours. This will allow the open wounds on the pruned roots to callous over. This is a good practice to prevent any future root issues. Then pot it up in a new pot with plenty of drainage holes. In addition, use a well-draining potting mix, maybe even add some extra perlite to increase drainage.
Once you have repotted your Monstera be mindful of the amount and frequency you are watering it. You also want to keep it in the same amount of light it was receiving before. Do pretty much anything you can to avoid additional shock because root rot and root pruning are shocking enough.
I actually decided not to mess with the roots of my poor pandemic Monstera. Instead, I chopped the whole plant up and I’m propagating all the nodes. Stay tuned for more posts on propagating Monsteras.
Does your Monstera have root rot? I hope this post helps you figure it out and fix it if you do. Let us know in the Comments.
I'm a long time plant lover on the quest to happily coexist with as many plants as I can. Let's grow!
Hello there! I simply would like to offer you a huge thumbs up for the excellent info you have got right here on this post. I will be returning to your blog for more soon.
Thank you!